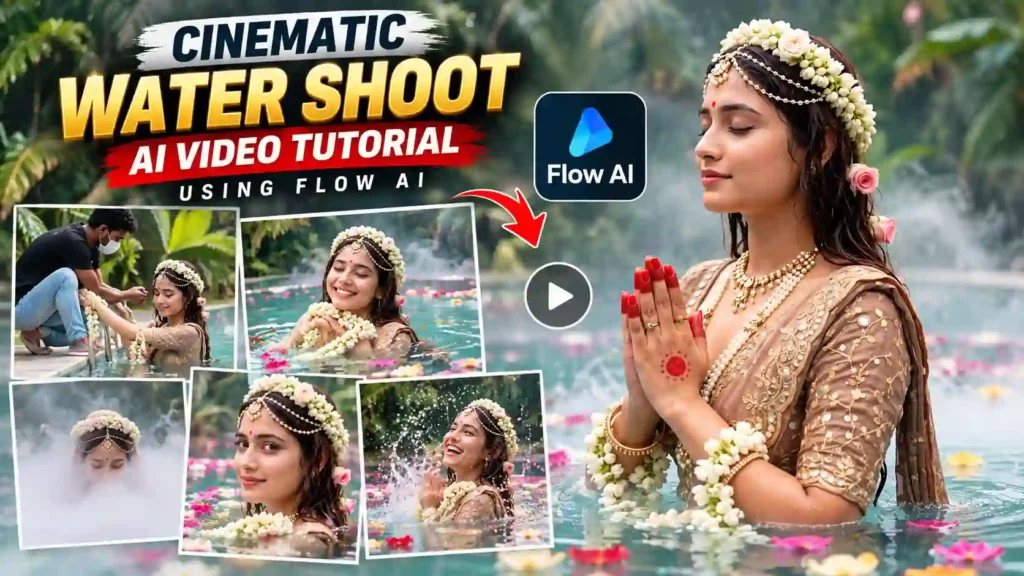
How to Create a Cinematic Apsara Water Shoot AI Video Using Flow AI
AI video generation ke saath ab aap ek simple reference photo ko cinematic water shoot, classical bride aur apsara-style video mein transform kar sakte hain. Is type ke videos mein floral jewellery, mirror-work outfit, green-turquoise pool, floating flowers, mist effect aur slow cinematic movements ka combination use hota hai.
Is article mein hum step-by-step dekhenge ki Flow AI mein reference image upload karke aisa cinematic video kaise create karna hai. Actual video prompt ko article mein repeat nahi kiya gaya hai, kyunki complete prompt website ke prompt section mein available hoga.
What Makes This AI Video Special?
Is concept ka sabse interesting part iska cinematic storytelling sequence hai.
Video ki beginning ek behind-the-scenes water shoot se hoti hai, jahan ek masked crew member subject ko pool ladder par assist karta hua nazar aata hai.
Uske baad scene gradually cinematic aur dream-like ho jata hai.
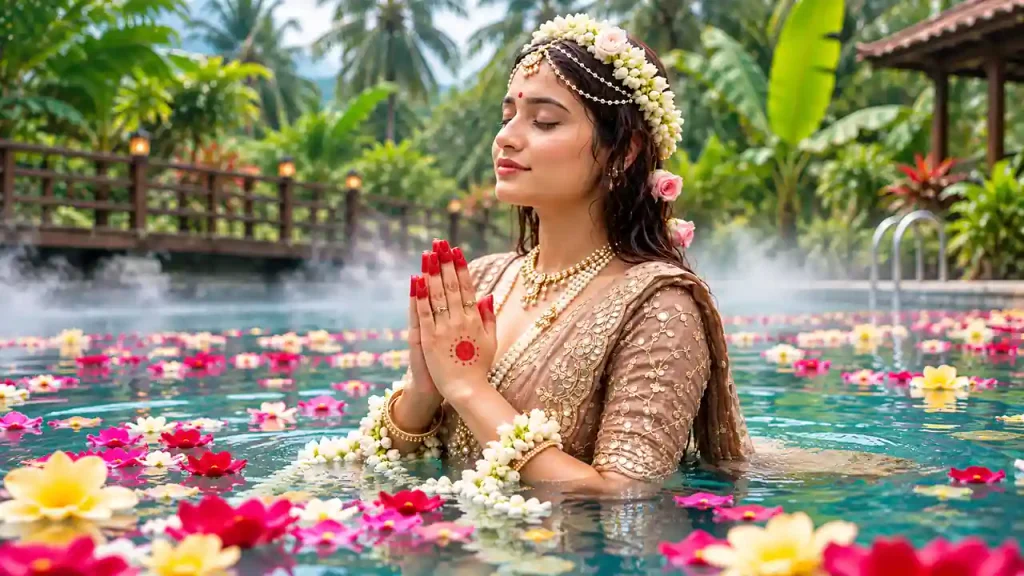
Woman water ke andar floral garlands ke saath nazar aati hai, phir pool ke upar mist spread hoti hai. Mist ke beech se floral crown dikhai deta hai aur subject slowly water se emerge karti hai.
Video mein gradually:
- Floral bride/apsara look
- Jasmine flowers
- Pearl jewellery
- Mirror-work outfit
- Green-turquoise pool
- Floating petals
- Cinematic mist
- Namaste pose
- Direct camera gaze
- Graceful turn
- Final water splash
jaise elements dikhai dete hain.
Step 1: Open Flow AI
Sabse pehle apne mobile ya computer mein browser open karein aur Flow AI website par visit karein.
Website open hone ke baad apne account se login karein.
Login ke baad aapko AI content creation ke different options दिखाई denge. Yahan video generation ke liye available workflow select karein.
Step 2: Select the Image-to-Video Workflow
Ab video creation section mein jaiye.
Aapke Flow AI interface ke version ke according option ka naam different ho sakta hai, jaise:
- Image to Video
- Reference to Video
- Create Video
- AI Video
Agar aap already ek reference photo use karna chahte hain, to image/reference based video workflow select karein.
Is workflow ka main purpose hi ek existing image ko visual reference ke roop mein use karke animated video create karna hai.
Step 3: Upload Your Reference Image
Ab Upload Image ya Reference Image option par click karein.
Yahan woh photo upload karein jiska face aur overall appearance aap video mein maintain karna chahte hain.
Reference image choose karte waqt kuch important points dhyan mein rakhein:
- Face clearly visible hona chahiye.
- Image blurry nahi honi chahiye.
- Facial features clearly visible hone chahiye.
- Hair reasonably visible hona chahiye.
- Face kisi object se covered nahi hona chahiye.
- High-quality image use karna better rahega.
Agar reference image clear hogi, to AI ko subject ke appearance ko understand karne ke liye better visual information milegi.
Step 4: Select 9:16 Aspect Ratio
Ye concept specially Instagram Reels, YouTube Shorts aur other vertical video platforms ke liye suitable hai.
Isliye video settings mein:
Aspect Ratio → 9:16
select karein.
Vertical format mein subject ko central area mein rakhna important hai, kyunki water, mist, flowers aur tropical background ko bhi frame mein enough space chahiye.
Step 5: Choose a Suitable Video Model
Ab available AI video models mein se ek suitable model select karein.
Aapke Flow AI interface mein available models account aur current platform options ke according different ho sakte hain.
Aisa model choose karein jo:
- Reference image support karta ho
- Realistic human movement generate kar sake
- Cinematic camera movement handle kar sake
- Water effects generate kar sake
- Natural environmental motion create kar sake
Agar first generation expected result nahi deti hai, to different available model ke saath bhi try kiya ja sakta hai.
Step 6: Copy the Prompt From the Website
Ab sabse important step aata hai.
Is video ke liye complete cinematic prompt website ke prompt section mein available hai.
Aapko article ke andar prompt dobara type karne ki zarurat nahi hai.
Simply:
Copy Prompt → Flow AI Prompt Box → Paste
karein.
Prompt paste karne ke baad uploaded reference image ko remove na karein.
Reference image + detailed prompt dono ko saath use karna is workflow ka important part hai.
Step 7: Generate the Video
Ab image upload aur prompt paste karne ke baad settings ko ek baar check karein.
Recommended setup:
Format: 9:16
Style: Cinematic / Photorealistic
Reference: Uploaded Image
Quality: Highest Available
Duration: Available Option
Ab Generate button par click karein.
AI reference image aur instructions ko process karke video generate karega.
Generation complete hone mein thoda time lag sakta hai, jo selected model aur current workload par depend karega.
Step 8: Check the Generated Video
Video generate hone ke baad immediately download karne ke bajay pehle complete preview dekhein.
Sabse pehle face consistency check karein.
Dekhein:
- Face reference photo jaisa lag raha hai ya nahi
- Facial features stable hain ya nahi
- Hairstyle unnecessarily change to nahi ho raha
- Skin tone consistent hai ya nahi
- Expression natural hai ya nahi
Uske baad costume aur jewellery check karein.
Specially dekhein:
- Floral crown stable hai ya nahi
- Jewellery properly maintain ho rahi hai ya nahi
- Mirror-work outfit distort to nahi hua
- Jasmine garlands naturally move kar rahe hain ya nahi
- Hands aur fingers realistic hain ya nahi
Step 9: Check the Water and Mist Effects
Is particular concept ka main attraction water + mist effect hai.
Generated video mein water movement natural hona chahiye.
Subject ke movement ke saath water aur floating petals bhi naturally react karne chahiye.
Mist pool ke surface ke upar smoothly move hoti hui nazar aani chahiye.
Agar fog suddenly disappear ho jaye, face ko completely cover kar de ya unnatural direction mein move kare, to another generation try karna better rahega.
Final splash bhi realistic hona chahiye. Water droplets natural direction mein move karne chahiye aur subject ke face ko distort nahi karna chahiye.
Step 10: Understand the Shot Sequence
Is concept ki biggest strength iska shot progression hai.
Video ko ek simple image animation ki tarah nahi, balki ek short cinematic story ki tarah design kiya gaya hai.
Sequence roughly:
BTS Assist → Smile → Mist → Reveal → Prayer → Eye Contact → Turn → Splash
Opening mein crew member aur ladder authentic BTS feeling create karte hain.
Middle section mein mist aur prayer pose video ko dreamy look dete hain.
Frontal eye-contact shot character ko camera ke saath connect karta hai.
Finally graceful turn aur splash-laugh shot video ko energetic ending deta hai.
What If the First Result Is Not Perfect?
AI video generation mein first attempt perfect hona zaroori nahi hai.
Kabhi-kabhi AI:
- Face change kar sakta hai
- Jewellery modify kar sakta hai
- Hands distort kar sakta hai
- Flowers change kar sakta hai
- Water movement unnatural bana sakta hai
- Camera movement too fast kar sakta hai
- Costume details lose kar sakta hai
Aise case mein same reference image ke saath multiple variations generate karein.
Agar platform mein different models ya generation variations available hain, to unhe bhi test kar sakte hain.
Tips for a Better Reference Image
Reference image video quality par kaafi impact daal sakti hai.
Use a Clear Face
Face clearly visible hona chahiye.
Avoid Extreme Lighting
Bahut dark ya overexposed image avoid karein.
Use High Resolution
Low-quality screenshot ke bajay high-resolution photo use karein.
Keep the Face Unobstructed
Sunglasses, hands ya other objects se face covered na ho to identity consistency ke liye better starting reference mil sakta hai.
Natural Expression
Simple natural expression wali photo ek useful starting point ho sakti hai.
Step 11: Edit the Video in CapCut
Flow AI se generated video download karne ke baad aap ise CapCut ya kisi other video editor mein further edit kar sakte hain.
Editing timeline mein video import karein.
Uske baad:
- Unwanted frames trim karein.
- 9:16 vertical format maintain karein.
- Cinematic background music add karein.
- Water splash sound add karein.
- Subtle ambient sound add karein.
- Colour adjustment karein.
- Final video export karein.
Is concept ke liye soft flute, Indian classical strings aur subtle water ambience video ke visual mood ke saath achha match kar sakte hain.
Recommended Export Settings
Agar aap video ko Instagram Reel ya YouTube Short ke liye use kar rahe hain, to 9:16 format maintain karein.
Recommended settings:
| Setting | Recommended |
|---|---|
| Resolution | 1080 × 1920 |
| Aspect Ratio | 9:16 |
| Frame Rate | 30 FPS |
| Format | MP4 |
| Codec | H.264 |
Agar original video higher resolution mein generate hua hai, to editing ke baad high-quality export use karein.
How to Make the Video Look More Cinematic?
Is type ke video mein sirf beautiful costume important nahi hai. Story progression aur visual contrast bhi important hai.
Starting:
Real BTS Setup + Crew + Pool Ladder
Then:
Water + Flowers + Mist + Jewellery
Then:
Apsara Reveal + Namaste + Eye Contact
And finally:
Graceful Turn + Water Splash + Laugh
Ye progression video ko ek normal AI-generated clip ke bajay cinematic short-story feel deta hai.
BTS opening specially important hai, kyunki masked crew member aur ladder audience ko ye feeling dete hain ki woh ek real professional water shoot ke behind-the-scenes moment ko dekh rahe hain.
Final Result
Flow AI ke through aap ek normal reference photo ko ek detailed cinematic apsara-inspired water shoot video mein transform kar sakte hain.
Floral crown, jasmine garlands, pearl jewellery, mirror-work costume, turquoise pool, floating petals aur cinematic mist milkar ek visually rich sequence create karte hain.
Overall workflow simple hai:
Reference Image Ready → Flow AI Open → Image/Reference Video Select → Reference Image Upload → 9:16 Select → Website Se Prompt Copy → Flow AI Mein Paste → Generate → Result Check → CapCut Mein Edit → Final Export
Agar first generation perfect na aaye, to same reference image ke saath multiple variations generate karein aur face consistency, hands, jewellery, costume, water physics aur mist movement ko carefully compare karein.
Complete ready-to-copy video prompt website ke prompt box mein diya gaya hai, isliye aap directly wahan se copy karke Flow AI mein paste kar sakte hain.